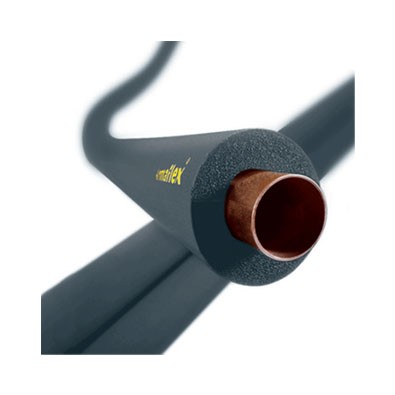
Insulating water supply pipes in the exposed areas of your home is highly important for a variety of reasons. As an example, in cold-winter climates, water supply pipes that are exposed to exterior walls or unheated spaces are prone to rupture, burst, and possibly flood your home. Insulating water pipes is a key element to any efforts to reduce the risk of such things happening in your home.
Some of the positives from insulating water pipes include saving money on energy costs by preventing the hot water pipes from losing their heat. As an example, insulating the hot water pipes leading out of from your water heater, can help reduce heat loss and lower the costs of heating the water. Also, by insulating cold water pipes this can prevent the pipes from sweating due to condensation, which in turn can reduce humidity levels in the house during the summer months.
Where You Should Insulate Your Water Pipes
Which water pipes you insulate will depend on why you are doing it. If the goal is to prevent frozen pipes, then the critical pipes to protect are those that run through unheated spaces. These are located in exterior walls, unheated garages, the floor cavities above unheated crawl spaces, unheated attics, etc. Generally speaking, it's not necessary to insulate pipes that run through interior walls or in basements that are heated. When preventing freezing is the goal, insulate both the hot- and cold-water pipes. Hot water pipes can also freeze unless water is actively running through them.
If your end goal is to lower your overall water-heating costs, then it is wise to insulate all your hot water pipes wherever you have access to them. This again will help prevent heat from radiating away from the hot water pipes and also may allow you to lower the temperature setting on your water heater, which is a bonus.
If the goal of pipe insulation is to stop the pipes from sweating and increasing humidity, then it is your cold water pipes that will need insulation. When exposed cold pipes are in contact with warm, humid air, condensation inevitably can form on the pipes. This condensation may actually drip and cause puddles to form on the floor, or it can contribute to an overall high humidity level and cause all manner of problems, especially in basements. Insulating the cold water pipes can prevent condensation from forming
There are several ways that you can use to insulate water pipes:
- Insulating them with strips of pipe wrap
- Using foam pipe sleeves
- Adding wall insulation
- Using covers on outdoor taps
- Installing frost-proof outdoor taps
- Insulating gaps where pipes go through the wall
Equipment / Tools You Will Need
- Utility knife
- Insulating pipe wrap
- Duct tape
- Foam pipe covers
- Outdoor tap covers
So we take a look at the two main insulation types for water pipes
Pipe-Wrap Insulation
Start the Insulation Strip
Tape the end of the insulation strip to the pipe
Wrap the Pipe
Wrap the insulation around the pipe in spiral loops, overlapping each loop by at least 1/2 inch. Completely cover the pipe, taking care not to leave any areas exposed.
Finish Wrapping
Tape the end of the insulating strip into place. If you need to, continue with another length of pipe wrap insulation until you have covered the full, length of the pipe.
Foam Pipe Sleeves
Positioning the Sleeve
Position the sleeves lengthwise along the pipe and pry open the slit in the sleeve. Slide the sleeve over the pipe and the slits will close up around the pipe.
Seal the Seam
Seal the seam, using either the self-adhesive strip integrated into the sleeve or duct tape, apply along the length of the slit. If needed, continue to the next sleeve by pushing it up against the end of the previous sleeve. If the pipe is turning a corner, you can simply cut the sleeves to fit around the corner.
Finish the Installation
At the end of runs, cut the foam tube to length, using a utility knife. When the installation is completed, also tape the butt seams where two sleeves meet.


